How to Create Your Own Luxurious Handcrafted Soap
There's something uniquely satisfying about crafting your own soap from scratch. Beyond the delightful aromas and creamy lathers, homemade soap allows you to control the ingredients, ensuring a healthier and more personalized product for your skin. In this homemade soap recipe, we'll guide you through the process of creating a luxurious, all-natural bar of soap that not only cleanses but also nourishes your skin. Whether you're a seasoned soap maker or a beginner, get ready to embark on a creative and aromatic journey into the world of handcrafted soap.
Equipment
- Heat-resistant container
- Thermometer
- Soap mold (silicone molds work well)
- Immersion blender
- Safety gear (gloves, goggles, and a well-ventilated area)
Materials
- 2 cups pure vegetable oil (such as olive oil, coconut oil, or almond oil)
- half cup cold or distilled water
- quarter cup lye (sodium hydroxide) (CAUTION: lye is a caustic substance, so handle it with care, wearing gloves and protective eyewear)
- optional essential oils for fragrance (e.g. lavender, eucalyptus or peppermint)
- optional natural colouring agents (e.g. turmeric for yellow or spirulina for green)
Instructions
Safety First
- Always work in a well-ventilated area, wear protective gear, and be cautious when handling lye.
- Keep children and pets away from your workspace.
Prepare Your Mold
- Grease or line your soap mold to make it easier to remove the soap later.
Measure the Ingredients
- Measure the water and lye separately.
- Then, while wearing safety gear, add the lye to the water.
- Never pour water into lye, as it can cause a dangerous reaction.
- Stir until dissolved.
- The mixture will become very hot.
Heat the Oils
- In a heat-resistant container, gently heat your chosen vegetable oils until they reach around 100-110°F (37-43°C).
Mix the Lye Solution and Oils
- When both the lye solution and oils are at the desired temperature, slowly pour the lye solution into the oils.
- Stir gently with a wooden or plastic spoon.
Blend the Mixture
- Use an immersion blender to mix the oils and lye solution
- Continue blending until the mixture reaches "trace," which means it thickens and leaves a faint trace when dribbled on the surface.
Add Fragrance and Colour
- If desired, add a few drops of essential oil for fragrance and natural colouring agents at this stage.
- Mix well.
Pour into Mold
- Pour the soap mixture into your prepared mold.
Set and Cure
- Allow the soap to set in the mold for 24-48 hours, or until it's firm enough to cut.
- Once cut into bars, let them air dry for 4-6 weeks to cure completely.
- This allows the soap to harden and lose excess moisture, making it milder and longer-lasting.
Enjoy
- Once cured, your homemade soap is ready for use
- Be sure to store it in a cool, dry place.
Notes
Remember that homemade soap-making can be a creative and enjoyable hobby, but it's essential to follow safety precautions and handle lye with care. Additionally, you can experiment with different oils and additives to create a unique, healthy soap tailored to your preferences.
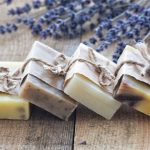
Main - Photo by Aurélia Dubois on Unsplash